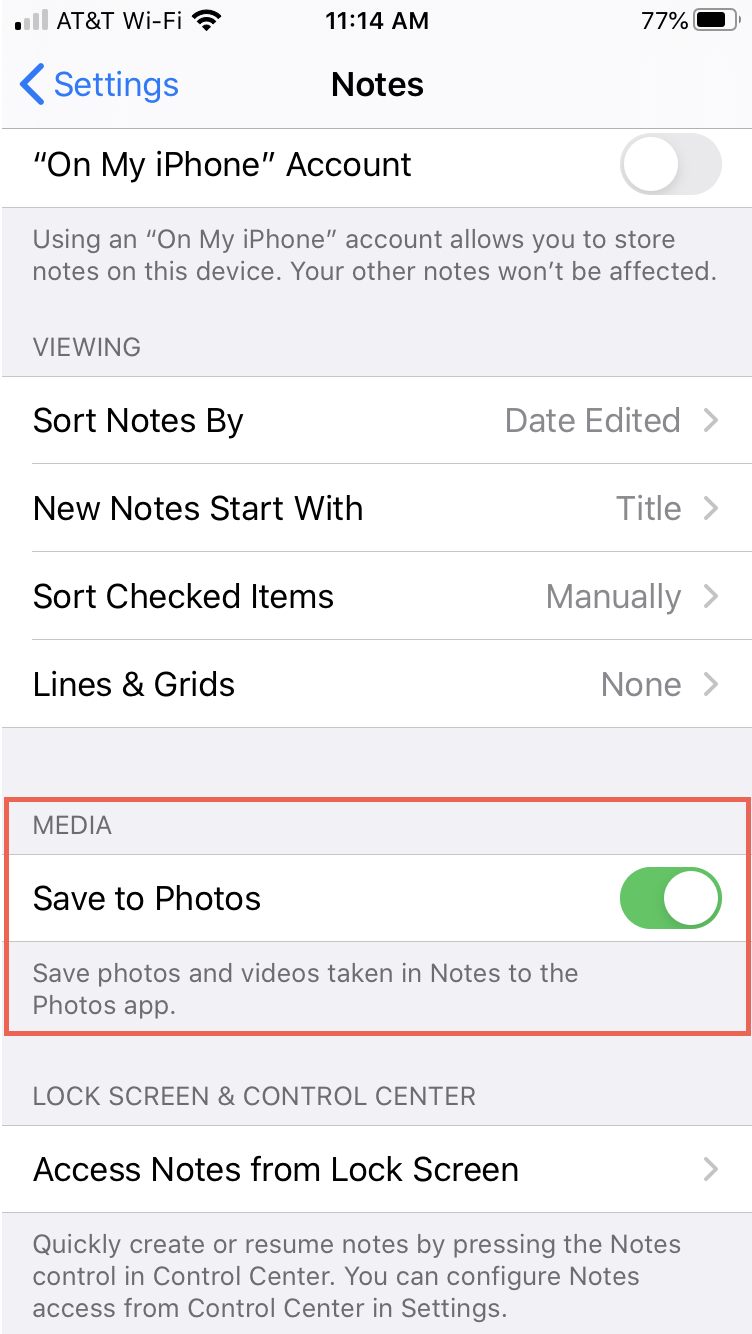
If you use the Notes app on your iPhone or iPad for not just note-taking but capturing photos, videos, and scans to reference within your notes, you can also save those items to your Photos app.
This means that if you want to use that capture for something else, you can find it easily in Photos rather than opening the Notes app for it. Maybe you thought this was happening all along, only to discover recently that it’s not.
Here’s how to automatically save photos, videos, and scans taken in Notes to Photos on iPhone and iPad.

Maybe you want to capture a photo for your school assignment, a video for a home project list, or a scan for a business note. Here’s how to save those items to Photos.

Easy, right? And you can give it a quick test if you like. Open the Notes app, capture a photo, video, or scan, and then head to your Photos app to make sure it’s there.
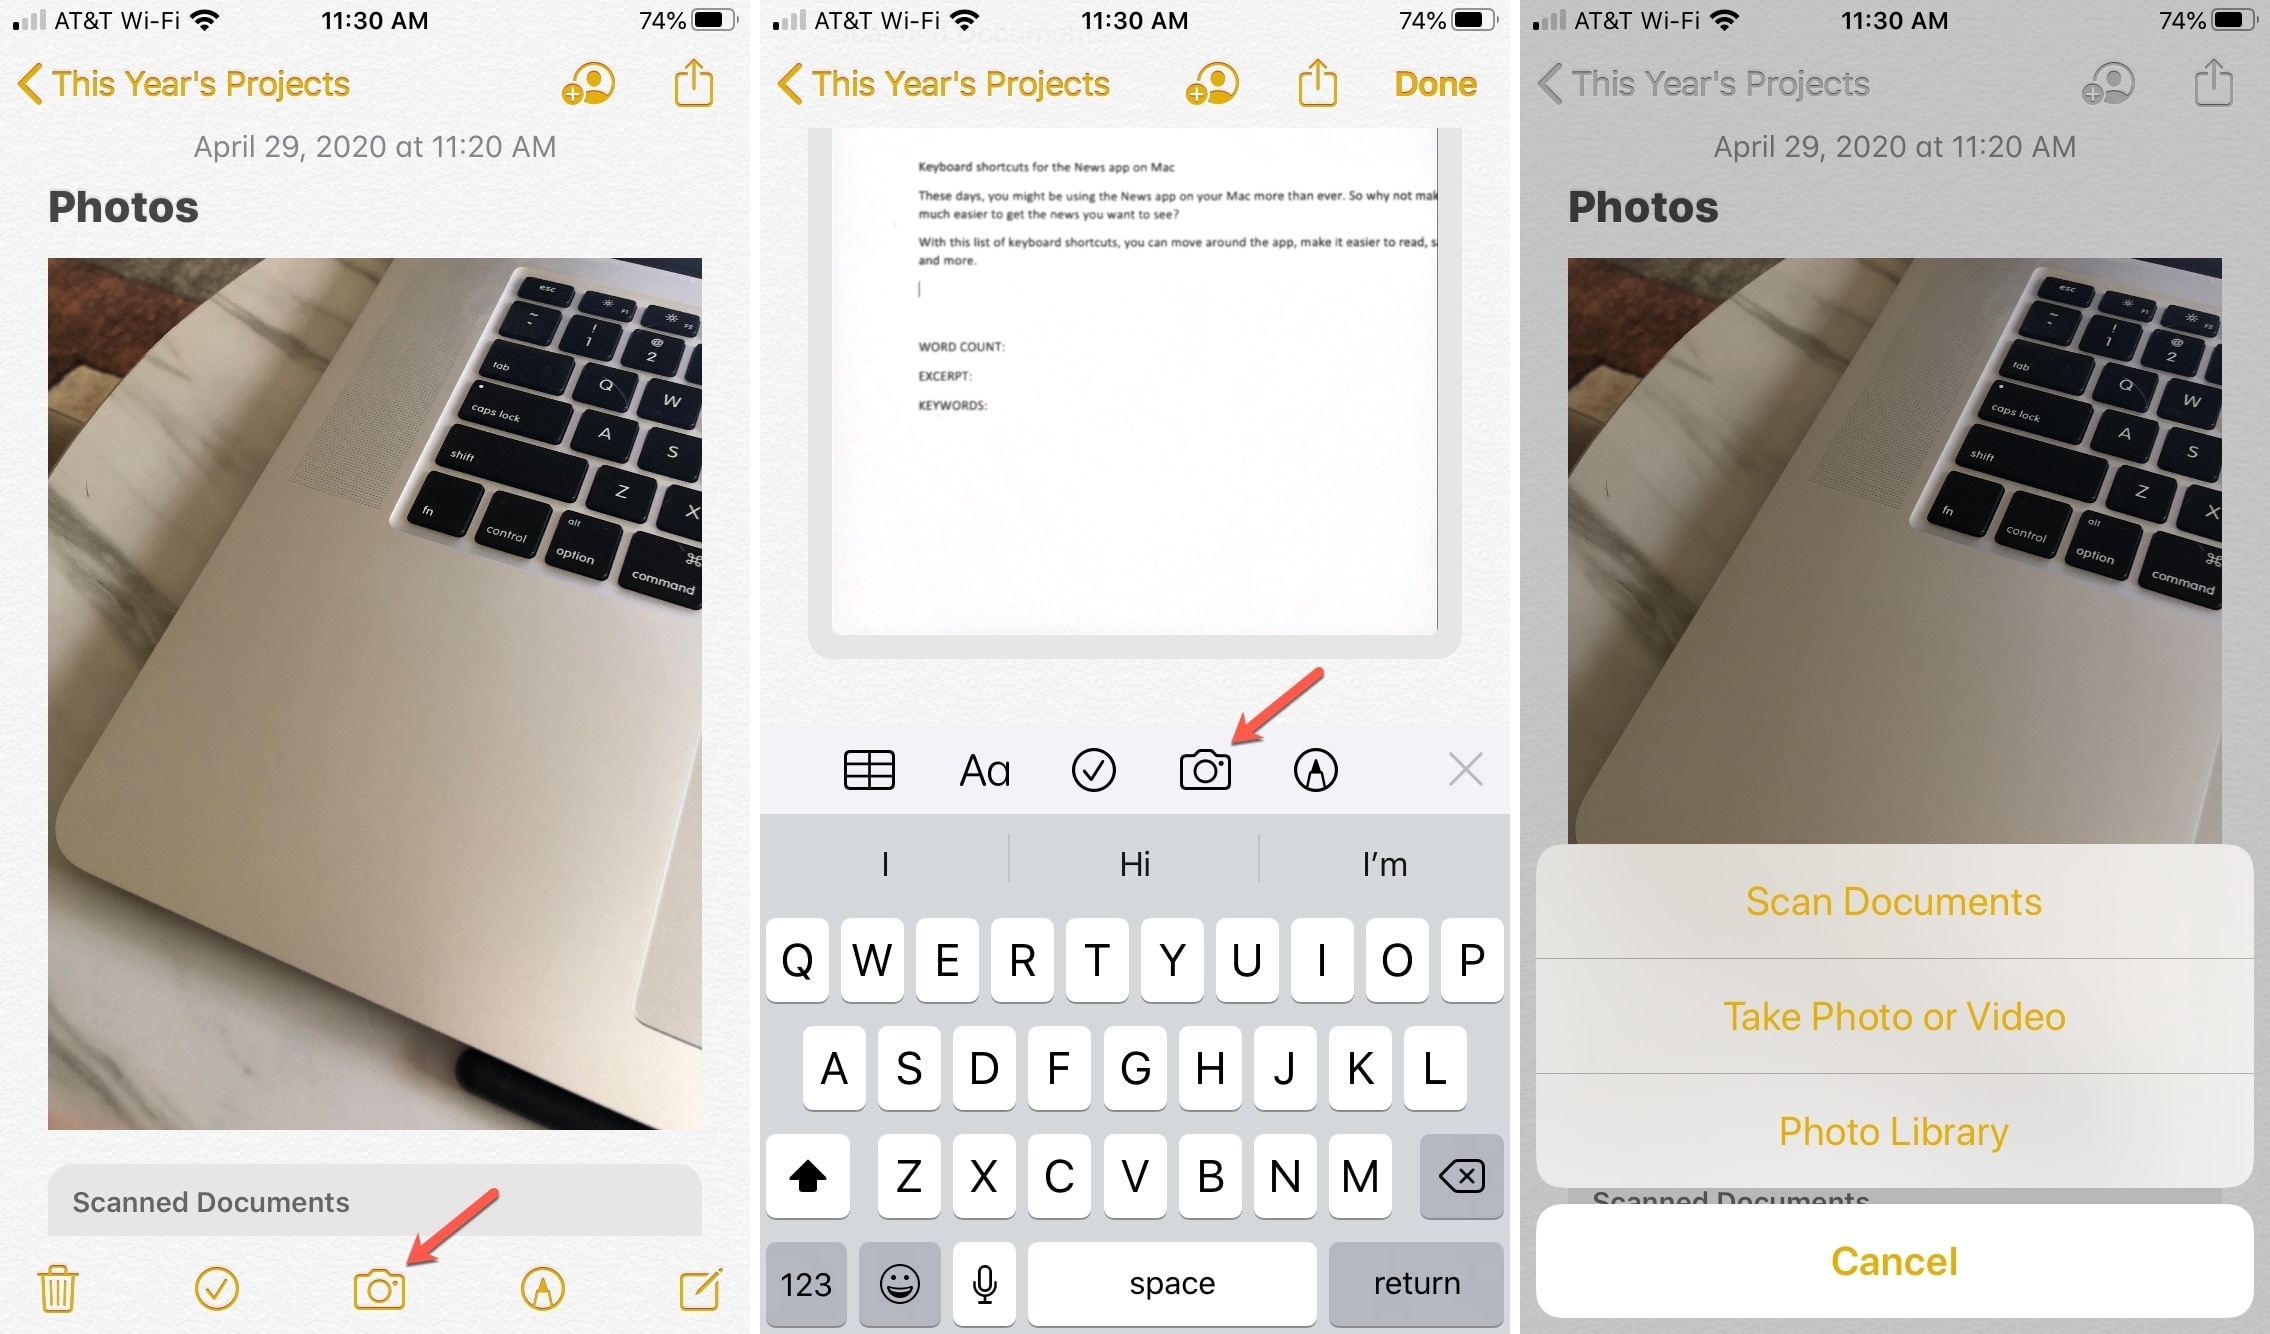
If you have a note that you want to add a photo, video, or scan to as a reference, this is a great way to keep things together. But if you haven’t done it before, here’s how.
With your note open, tap the spot where you want to add the item. You’ll then see the camera icon in the toolbar. Tap it and then choose to Take a Photo or Video or Scan Documents. (You can also add an item from your Photo Library.)

That item will then appear right inside your note. And if you enabled the setting above, it will also be saved in your Photos app.
The feature is not available for certain types of Notes accounts like Gmail or Exchange.
You can always head to the Notes app and browse specifically for attachments like those mentioned here. But saving those types of things to the Photos app can come in handy! Are you going to enable this setting, or maybe you already have? Let us know!
Do more with Notes: